21 Bit Protocol Scales
Scale Cable Kit
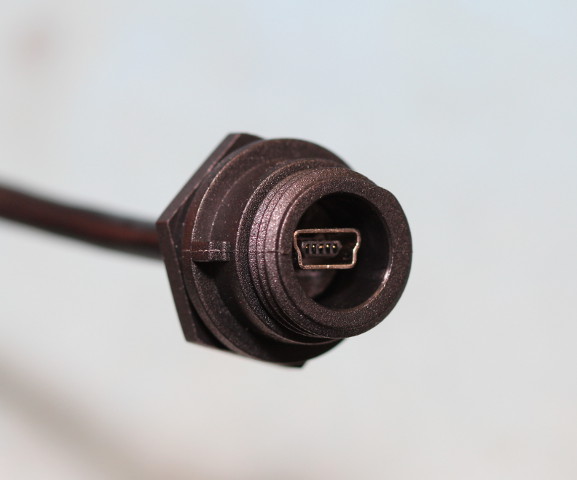 ShumaTech offers a 21 bit scale cable kit that enables the DRO-550 to use the iGaging scales. The cable kit comes with a USB mini B female cable, two jumper wires, two 100 mil headers, and a piece of heat shrink tubing. The USB cable mounts to the back panel of the DRO-550 and is environmentally sealed with a rubber O-ring. A picture of the USB side of the cable is shown at left.
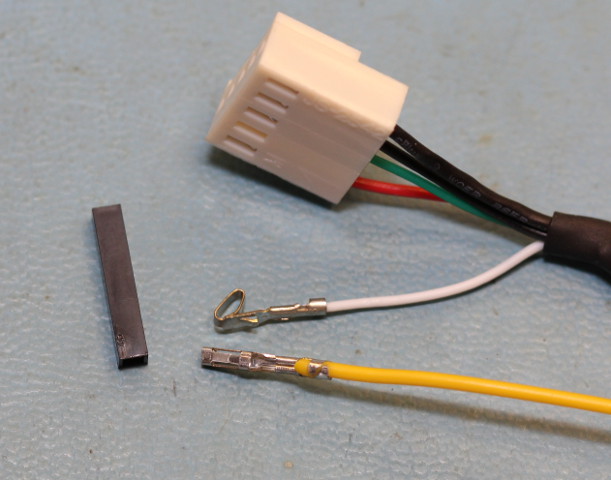
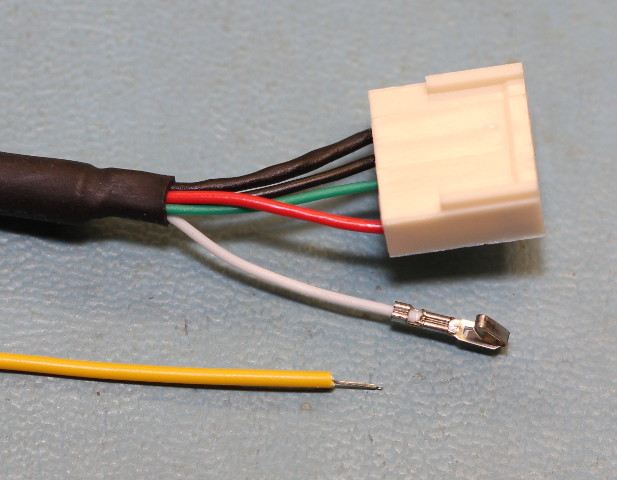
The other end of the USB cable terminates with a standard 100 mil plug with 5 pins. The extra fifth pin is a shield connection and is not used for the DRO-550. To install the cable kit, first remove the housing from one side of the yellow jumper. Next, remove the white pin from the 5 pin plug. Both jobs are easy if you press the small locking clips out of the way with a small flat head screwdriver or a hobby knife.
The next step is to cut off the terminal from the yellow jumper cable end whose housing we just removed. Cut it as close as possible to the terminal to give maximum reach inside the DRO when it is installed. Strip off about 1/8" (3mm) of insulation from the cut end.
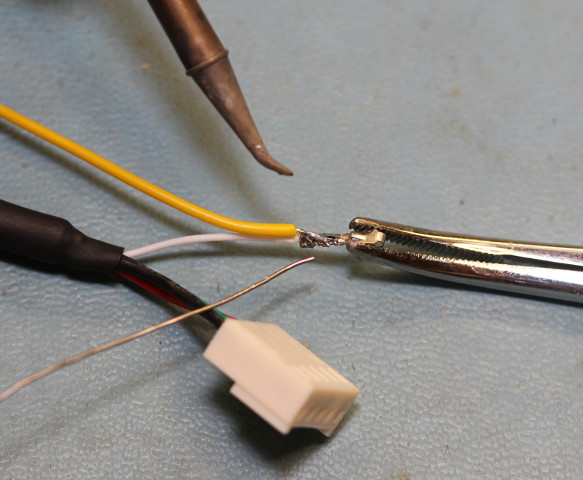
Take the stripped end of the jumper cable and solder it to the terminal of the white wire removed from the five pin plug. This is easiest to do from the back side of the terminal with the spring tab pointing down. That way the insulation of the white wire does not interfere with the solder flow. Use some solder flux first if you have it. Try to be sparing with the solder otherwise the terminal may be difficult to insert when we are done. At the same time, don't use so little solder that you end up with a poor solder joint. A pair of forceps (as show in the picture) or some helping hands can really assist you with holding the terminal and wire while you solder. Inspect your work with a magnifying glass to make sure that the joint is shiny and solid.
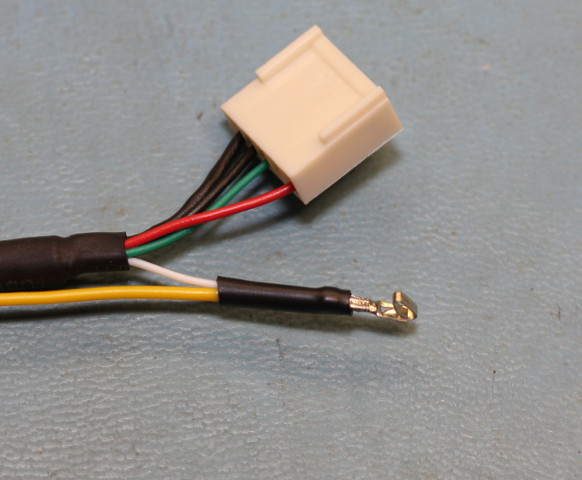
The last step is to place the included piece of heat shrink tubing over the terminal and onto the soldered connection. This helps to stress relief the connection so that it doesn't crack or break loose while installing the cable. Use a heat gun or other heat source to shrink the heat shrink onto the joint.
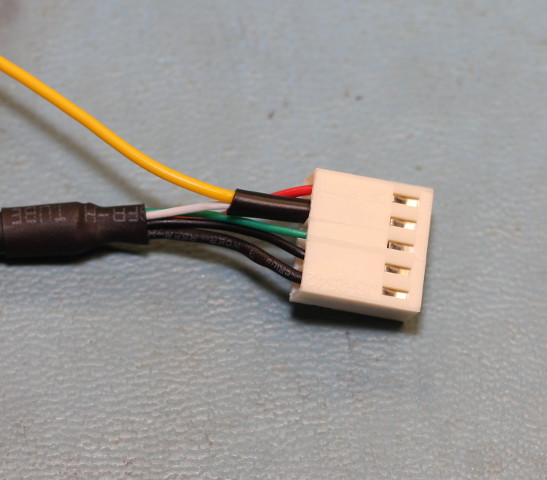
Insert the spliced connection back into the five pin plug. The spring tab on the terminal should be pointed away from the small rectangular window on the five pin plug. A tiny clip on the back side of the terminal should engage with the window when the terminal is insert all of the way to the front. You may have to squeeze the terminal joint and heat shrink a little with some pliers in order to get it to fit in the plug.